
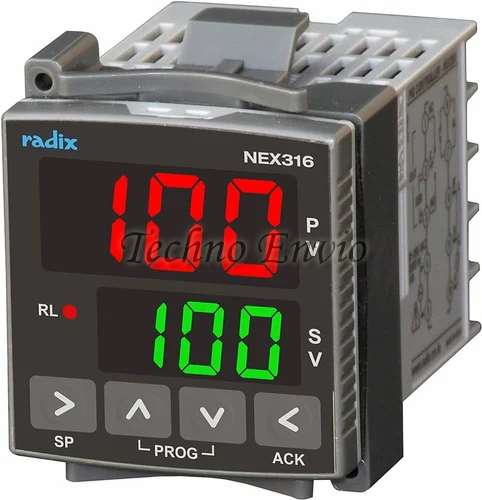
How to Inspect a Temperature Controller and Fix Common Issues
Temperature controllers play a crucial role in both industrial and household applications. Whether they are used in ovens, HVAC systems, plastic injection machines, incubators, or refrigeration units, these devices ensure temperatures stay within the required range. When a temperature controller fails, the entire system can suffer—leading to poor product quality, wasted energy, or complete equipment shutdown.
Like all electronic devices, temperature controllers can develop faults over time. The good news is that many issues can be diagnosed and repaired with basic tools and a clear inspection process. In this guide, you’ll learn how to inspect a temperature controller step-by-step, how to troubleshoot common problems, and when to replace parts. This article is written in a simple, practical way to help beginners, maintenance technicians, and DIY users get reliable results.
Step 1: Gather Tools and Materials
Before beginning your inspection, make sure you have the right tools. Preparing everything in advance will save time and ensure a smooth troubleshooting process.
Tools You Will Need
-
Multimeter (for voltage, resistance, and continuity tests)
-
Flathead and Phillips screwdrivers
-
Wire cutters/strippers
-
Needle-nose pliers
-
Compressed air (for cleaning dust)
-
Soft brush or microfiber cloth
-
Flashlight (to inspect small components)
Materials You May Need
-
Replacement fuses
-
Replacement temperature sensor (thermocouple/RTD)
-
Extra wiring and connectors
-
The user manual for your controller model
-
Electrical tape or heat-shrink tubing
Having the user manual nearby is especially important because temperature controllers vary by brand and model. Specifications, error codes, wiring diagrams, and resistance values are all found in the manual.
Step 2: Safety Precautions You Must Follow
Working with electrical equipment can be dangerous if proper precautions are not taken. Before touching the temperature controller:
1. Power Off the System
Always disconnect power from the controller and the machine it is connected to.
Never attempt to remove wires or open the casing while it is powered.
2. Use Proper PPE
Wear:
-
Safety goggles
-
Insulated gloves
-
Non-conductive shoes
3. Work in a Dry, Safe Area
Avoid wet surfaces and cluttered workspaces.
4. Follow Manufacturer Safety Guidelines
Different models may have special grounding or isolation requirements.
Safety should always be your top priority.
Step 3: Inspect the Temperature Controller (Step-by-Step)
Now the real work begins. Inspection is divided into visual, electrical, and functional checks.
A. Perform a Visual Inspection
Start by looking for obvious signs of damage:
-
Cracked or burnt housing
-
Melted plastic around terminals
-
Smell of burnt electronics
-
Loose or exposed wires
-
Display not powering or showing dim/incorrect characters
Dust buildup inside the controller is also a common cause of overheating and malfunction.
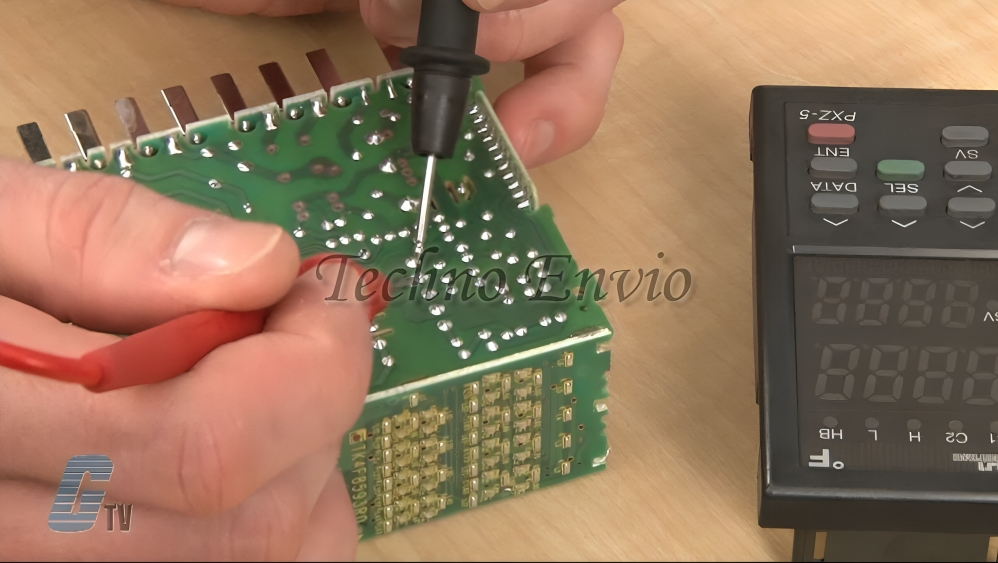
B. Inspect Electrical Connections
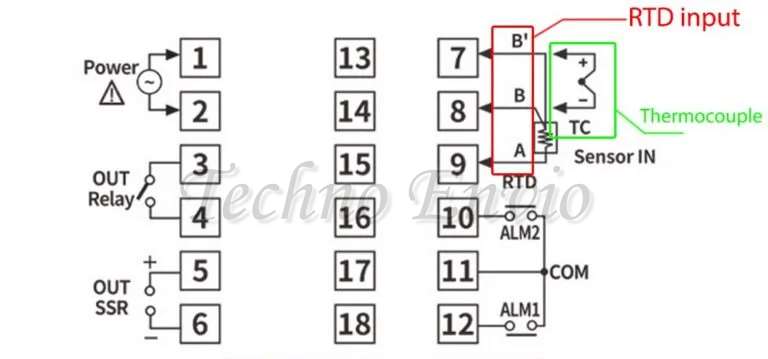
Open the controller carefully using the correct screwdriver.
Check the following:
-
Are all wires tightly connected?
-
Are any terminals loose, corroded, or burnt?
-
Are the sensor wires properly attached?
-
Is there any sign of moisture or rust?
Loose or oxidized connections can cause fluctuating temperatures or intermittent power.
C. Verify the Power Supply Input on Temperature Controller
A faulty power supply is one of the most common failures.
Use a multimeter to check the voltage at the input terminals:
-
For AC controllers: typically 110V, 220V, or 380V
-
For DC controllers: 12V, 24V, or 48V
Compare the reading to the manual’s specifications.
If voltage is missing or incorrect, the problem is likely external—not in the controller.
D. Test the Temperature Sensor
The temperature sensor (thermocouple, RTD, NTC) is responsible for reading the actual temperature.
Remove the sensor and test its resistance using a multimeter.
Typical examples:
-
PT100 RTD: 100 ohms at 0°C
-
Thermocouples: produce millivolt outputs
-
NTC Thermistors: have specific resistance curves
If the reading is far from the expected value, the sensor is faulty and must be replaced.
A damaged or inaccurate sensor is the number one cause of incorrect temperature readings.
E. Examine the Internal Components
Look closely at the internal circuit board:
-
Bulging capacitors
-
Burnt resistors
-
Discolored areas
-
Cracked solder joints
-
Faulty relays or SSR (solid-state relay)
Any damaged component should be replaced immediately.
Step 4: Fix the Most Common Temperature Controller Issues
Here are the typical problems you may encounter and how to fix them effectively.
| Issue | Possible Cause | Quick Fix |
|---|---|---|
| Controller not turning on | Blown fuse | Replace fuse |
| Incorrect reading | Wrong sensor type | Reconfigure settings |
| Temperature swings | Loose wiring | Tighten terminals |
1. Incorrect Temperature Controller Reading
Possible causes:
-
Faulty temperature sensor
-
Wrong sensor type selected in the controller settings
-
Loose sensor wiring
-
Sensor installed in the wrong location
Solutions:
-
Replace the temperature sensor if readings are unstable
-
Check controller settings (e.g., switch between K-type, J-type, PT100)
-
Tighten sensor terminals
-
Keep sensor away from drafts, moisture, or direct heat sources
2. Temperature Controller Not Turning On
Possible causes:
-
Blown fuse
-
Power supply failure
-
Loose power connections
-
Damaged display or internal components
Solutions:
-
Replace the fuse
-
Verify the input voltage
-
Inspect and tighten wiring
-
If the display board is burned, replacement may be required
3. Erratic Temperature Control (Overshooting or Undershooting)
Possible causes:
-
Loose wiring
-
Sensor noise or interference
-
Incorrect PID settings
-
Faulty relay or SSR
Solutions:
-
Tighten all wiring connections
-
Keep sensor wires away from high-voltage cables
-
Reset or fine-tune PID parameters
-
Replace the mechanical relay or SSR
PID settings are especially important in industrial applications where precision is required.
4. Faulty Relay Output
If the heater or cooling device doesn’t turn ON/OFF when required, the relay may be the problem.
How to check:
Use your multimeter to test for continuity across relay terminals.
Solution:
Replace the relay or SSR if no signal is detected.
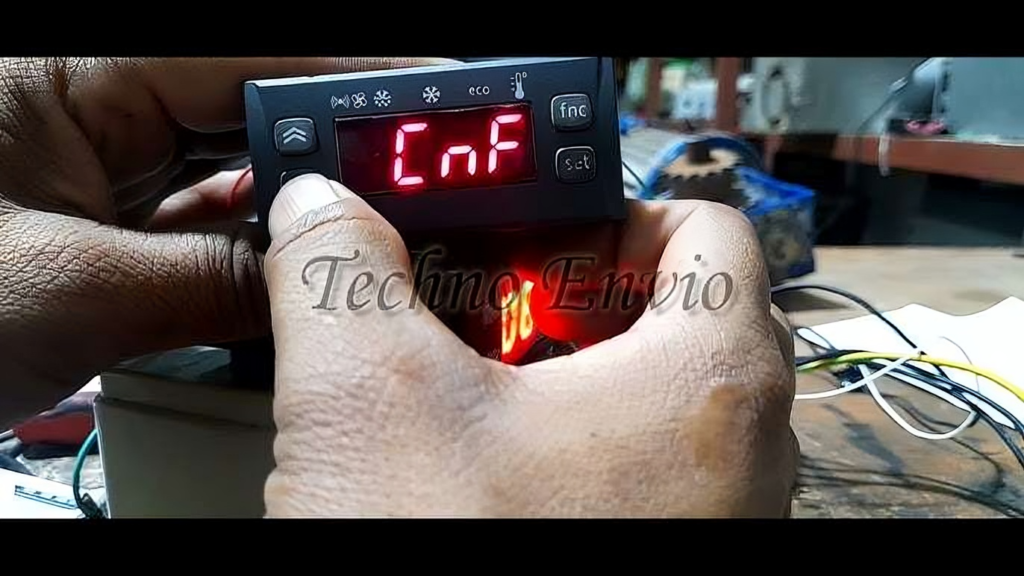
5. Error Codes on the Display
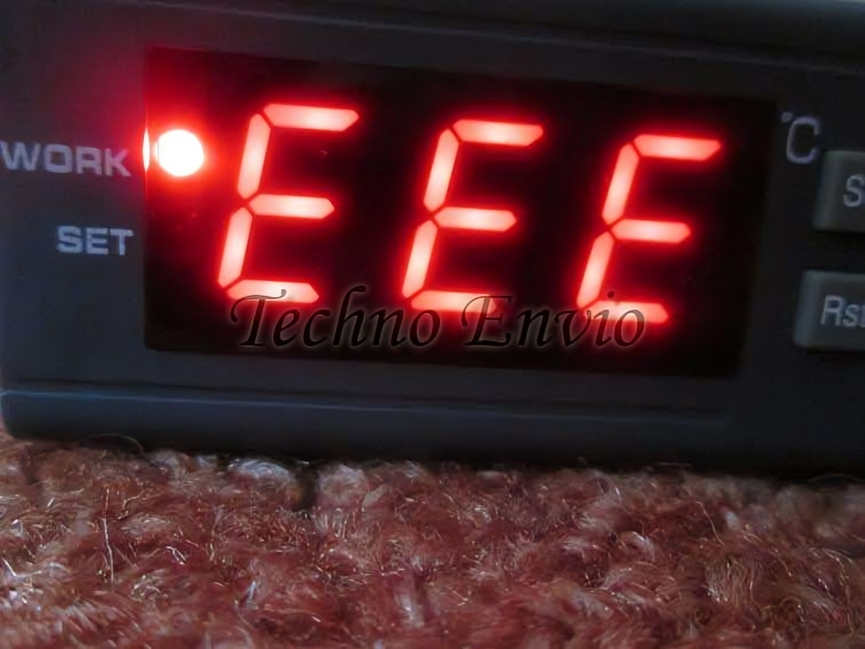
Every controller brand has its own error codes such as:
-
Sensor open circuit
-
Sensor short circuit
-
High/low temperature alarm
-
Internal communication error
-
Memory failure
Always refer to the user manual to understand the meaning and recommended fix.
Step 5: Reassemble and Test the Temperature Controller
Once repairs and adjustments are complete:
1. Reassemble the controller casing
Make sure all screws are tightened properly and wires are neatly arranged.
2. Power up the system
Connect the device and turn it on.
3. Test the temperature control function
-
Set a target temperature
-
Monitor heating/cooling response
-
Ensure the actual temperature stabilizes correctly
4. Observe the device for a few days
Watch for:
-
Error messages
-
Unstable readings
-
Repeated relay switching
-
Overheating
A stable controller should show consistent temperature performance.
FAQ
Q1: How often should I inspect my temperature controller?
You should inspect it at least once a year, and more frequently in industrial or high-temperature environments.
Q2: What are the warning signs that my temperature controller needs repair?
Common symptoms include:
-
Incorrect readings
-
Unexpected shutdowns
-
Frequent blown fuses
-
Slow response
-
Error codes
Q3: Can I replace the temperature sensor myself?
Yes. Sensors are usually easy to replace if you have basic electrical knowledge and follow the manual’s instructions.
Q4: Why does my controller show fluctuating temperature readings?
Fluctuations may be caused by:
-
Loose or rusty sensor terminals
-
Damaged sensor cable
-
Electrical noise from motors
-
Faulty sensor or PID settings
Q5: What should I do if the controller still doesn’t work after inspection?
If problems continue:
-
Call a certified technician
-
Consider replacing the controller if the PCB is damaged
-
Verify that external equipment (heater, fan, thermocouple) is working properly
Conclusion
Temperature controllers are vital components in many systems, and keeping them in good condition ensures reliable temperature stability, energy savings, and long equipment life. By following this step-by-step inspection and troubleshooting guide, you can diagnose most issues yourself—from faulty sensors to incorrect power supply connections.
Regular maintenance not only prevents unexpected failures but also improves overall system performance. Whether you’re a beginner or a maintenance technician, this guide gives you the knowledge you need to inspect, repair, and maintain temperature controllers with confidence.