Using Arduino with LEDs: A Beginner’s Guide
If you’re new to electronics and programming, using an Arduino to control LEDs is a fantastic way to start. With minimal components and some easy-to-follow code, you can make LEDs blink, create captivating light patterns, and even build interactive light displays. This guide will walk you through the basics of working with LEDs and Arduino, and by the end, you’ll be ready to tackle more advanced projects. Let’s dive in!
1. What You’ll Need to Get Started
To follow this guide, you’ll need a few items, many of which you can find in basic Arduino starter kits:
- Arduino board (such as Arduino Uno)
- LEDs (light-emitting diodes)
- Resistors (220-ohm or 330-ohm recommended)
- Jumper wires
- Breadboard (optional, but helpful for testing without soldering)
Having these components on hand will make it easy to set up and expand your projects as you progress.
2. Understanding LEDs: The Basics
An LED is a simple but powerful component that emits light when an electrical current passes through it. Each LED has two legs:
- Anode (positive): The longer leg, connected to the positive voltage.
- Cathode (negative): The shorter leg, connected to the ground (GND).
To safely connect an LED, you’ll need a resistor to limit the current, preventing the LED from burning out. For most LEDs, a 220-ohm or 330-ohm resistor will do the job.
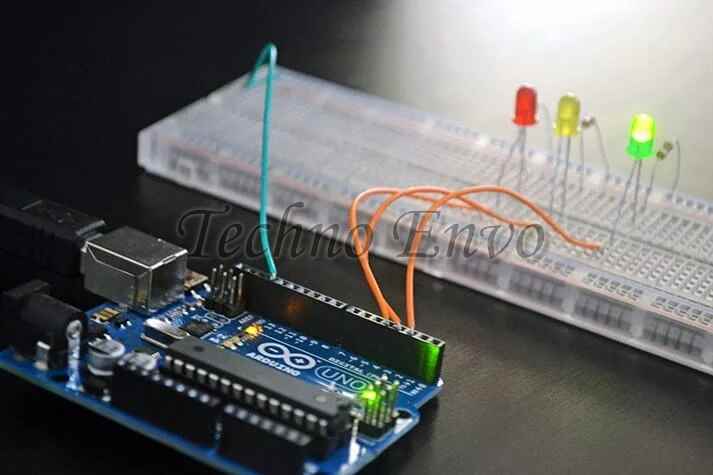
3. Setting Up a Simple LED Circuit
Let’s start by connecting a single LED to your Arduino:
- Set up the LED:
- Insert the LED into the breadboard. Connect a 220-ohm resistor to the anode (longer leg) of the LED.
- Attach the other end of the resistor to digital pin 13 on your Arduino.
- Connect the cathode (shorter leg) directly to GND on the Arduino.
- Power up the Arduino:
- Connect your Arduino to your computer via USB.
This simple setup allows the Arduino to control the LED, and you’re ready to start coding!
4. Writing Your First Arduino Code
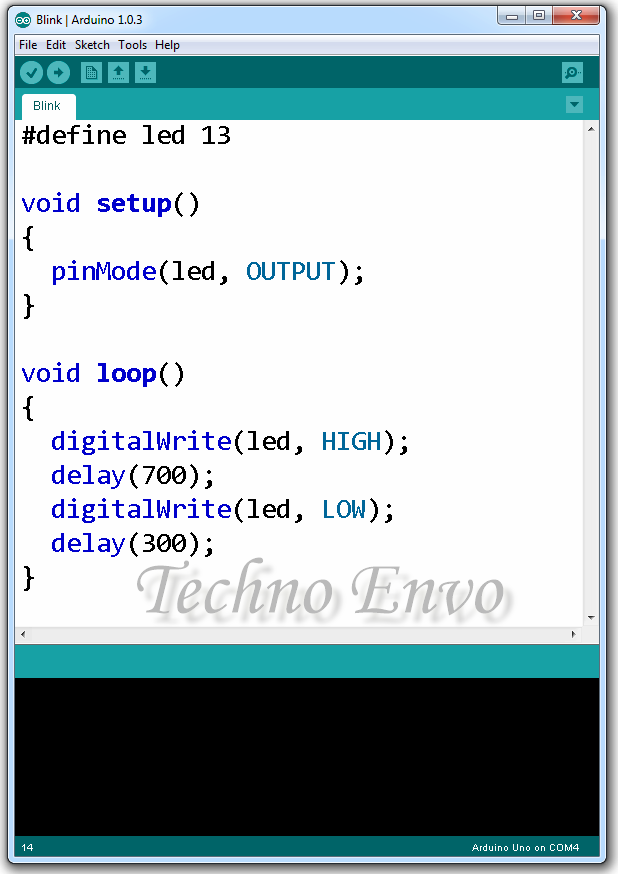
In the Arduino IDE, you’ll write code to control the LED. Open a new sketch and type in the following code:
Explanation:
pinMode(13, OUTPUT);tells the Arduino that pin 13 is used for output (to power the LED).digitalWrite(13, HIGH);turns the LED on.delay(1000);pauses the code for 1 second, keeping the LED on.digitalWrite(13, LOW);turns the LED off.
5. Customizing Your LED Blink Patterns
Want to change the blink rate? You can adjust the delay() values in the code:
- Faster Blink: Set
delay(500);to blink every 0.5 seconds. - Slower Blink: Set
delay(2000);for a slower, 2-second blink.
Experiment with different timings to create unique effects.
6. Experimenting with Multiple LEDs
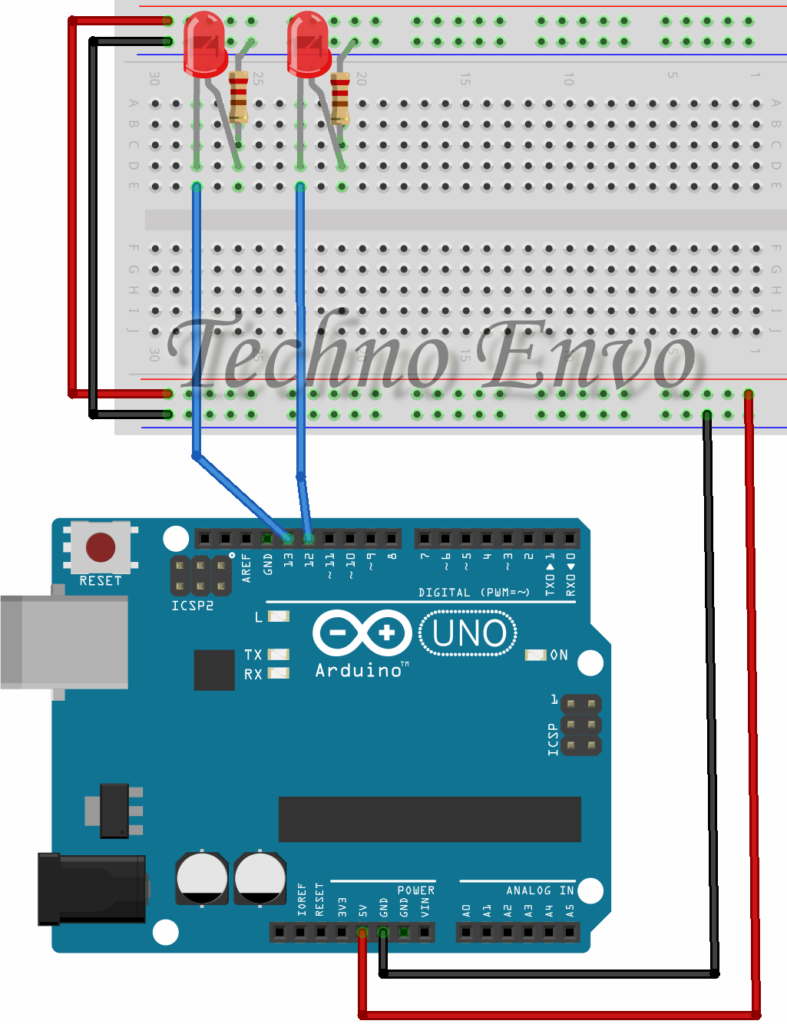
You can control multiple LEDs by wiring each one to a different digital pin. Here’s how to make two LEDs blink alternately:
- Setup:
- Connect one LED to pin 12 and another to pin 13 with a resistor for each.
- Connect both cathodes to GND.
- Code:
This will create an alternating blink pattern where each LED turns on and off in sequence.
7. Fun LED Arduino Projects to Try
Now that you’re comfortable with the basics, try exploring these beginner-friendly projects:
- LED Chase: Use a loop to make LEDs light up in sequence, creating a chasing effect.
- Traffic Light Simulator: Use three LEDs (red, yellow, green) to mimic a traffic light.
- Interactive Button: Connect a button to control when an LED turns on and off.
8. FAQ: Common Questions for Beginners
Q1: Can I connect an LED directly to an Arduino pin without a resistor?
- Answer: No, it’s not recommended. LEDs draw too much current directly, which can damage the LED or the Arduino. Always use a resistor to limit the current.
Q2: Why isn’t my LED turning on?
- Answer: Double-check your wiring, especially the polarity of the LED. Make sure the anode (long leg) connects to the resistor and the digital pin, and the cathode (short leg) connects to GND.
Q3: Can I control more than one LED with my Arduino?
- Answer: Yes! Most Arduino boards have multiple digital pins, allowing you to connect several LEDs and control them independently.
Q4: What’s the purpose of the delay function?
- Answer:
delay()pauses the program for a set amount of time, in milliseconds. This creates the on/off effect for the LED. Without it, the LED would blink too quickly for us to see.
Q5: Can I use different colors of LEDs in the same circuit?
- Answer: Absolutely! Just keep in mind that different colored LEDs may need different resistor values for optimal brightness.
Final Thoughts
Controlling LEDs with Arduino is just the beginning of what you can do with this powerful microcontroller. As you progress, you can add sensors, control motors, and build more interactive projects. Experiment with different LED patterns, try using external inputs like buttons or potentiometers, and soon, you’ll be able to create dynamic, responsive LED displays. Happy tinkering!
By following this guide, you’ve taken your first step into the world of Arduino and electronics. This hands-on approach not only builds technical skills but also helps you develop a mindset for problem-solving and creative thinking. Let your imagination run wild—your next project is just a few LEDs away!