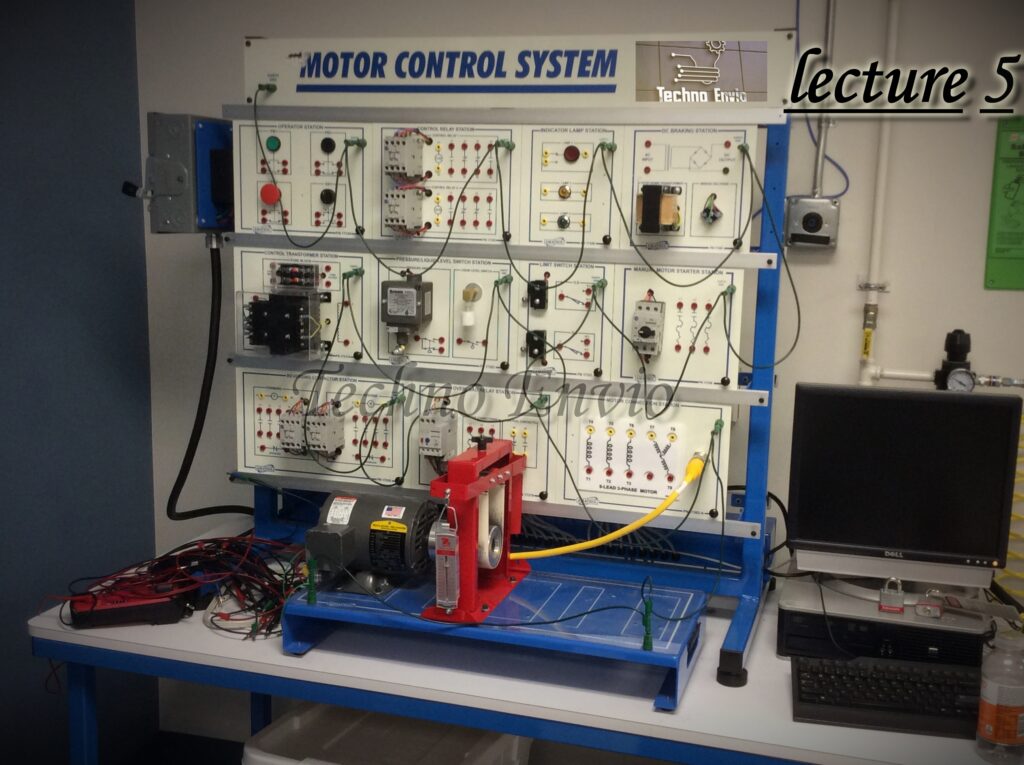
Part 8 Motor Maintenance and Troubleshooting: Ensuring Long Life and Reliable Operation
Regular maintenance and proper troubleshooting are critical for maximizing motor efficiency, reliability, and service life. Even high-quality motors can fail prematurely if neglected. This article covers preventive maintenance practices, common issues, troubleshooting steps, and practical tips for DC, AC, and single-phase motors.
1. Motor Maintenance
Motor maintenance is the set of activities performed to ensure reliable, efficient, and safe operation of electric motors. Proper maintenance extends motor life, prevents unexpected downtime, and reduces repair costs. Motors are critical in industrial applications, from pumps and conveyors to fans and compressors, making maintenance a high-priority task.

Objectives of Motor Maintenance
Motor maintenance aims to:
-
Prevent unexpected failures
-
Maintain efficiency and performance
-
Reduce energy consumption
-
Extend the life of bearings, windings, and other components
-
Ensure safety for personnel and equipment
Types of Motor Maintenance
1. Preventive Motor Maintenance
Performed regularly, based on time intervals or operating hours. Includes:
-
Cleaning and inspection
-
Lubrication of bearings
-
Checking electrical connections
-
Measuring insulation resistance
-
Monitoring vibration and temperature
Example: Lubricating a pump motor bearing every 6 months prevents overheating and vibration issues.
2. Predictive Motor Maintenance
Uses condition monitoring to predict motor issues before failure occurs. Includes:
-
Vibration analysis
-
Thermal imaging
-
Electrical testing (insulation resistance, winding resistance)
-
Motor current signature analysis (MCSA)
Example: Detecting bearing wear by vibration analysis before it leads to motor failure.
3. Corrective Motor Maintenance
Performed after a fault or breakdown. Includes:
-
Bearing replacement
-
Rewinding stator or rotor
-
Fixing electrical faults (shorts, open circuits)
-
Replacing damaged couplings or seals
Key Motor Maintenance Tasks
1. Motor Cleaning
-
Remove dust, dirt, and debris from motor housing and ventilation paths
-
Prevents overheating and insulation degradation
2. Motor Lubrication
-
Bearings must be lubricated per manufacturer guidelines
-
Avoid over-greasing, which causes overheating
-
Use correct grease type
3. Electrical Connections
-
Check terminals for tightness and corrosion
-
Inspect cables for insulation damage
-
Ensure correct phase sequence for three-phase motors
4. Insulation Checks
-
Use a megohmmeter to measure insulation resistance
-
Helps detect moisture, contamination, or aging of windings
-
Typical preventive value: ≥ 1 MΩ at 500 V
5. Motor Vibration and Noise Monitoring
-
Detects misalignment, imbalance, or bearing faults
-
Excessive vibration indicates potential mechanical or electrical issues
6. Temperature Monitoring
-
Use infrared thermometers or thermocouples
-
Motors running hotter than rated temperature risk insulation and bearing damage
Motor Maintenance Schedule Example
| Task | Frequency |
|---|---|
| Cleaning | Monthly |
| Bearing lubrication | Every 3–6 months |
| Electrical connection check | Quarterly |
| Insulation resistance test | Annually |
| Vibration analysis | Annually |
| Visual inspection | Monthly |
⚠ Adjust based on motor type, environment, and duty cycle.
Common Motor Maintenance Problems
-
Bearing overheating due to poor lubrication
-
Winding insulation failure from moisture or dust
-
Vibration from misalignment or imbalance
-
Loose electrical connections causing arcing
-
Contaminant ingress (dust, water, chemicals)
Tips for Effective Motor Maintenance
-
Always follow manufacturer guidelines
-
Keep maintenance logs for inspection and repairs
-
Train personnel on proper handling and safety procedures
-
Use condition monitoring tools for predictive maintenance
-
Schedule preventive maintenance to reduce unplanned downtime
Practical Industrial Example
Application: Cooling fan motor in a chemical plant
Problem: Motor temperature consistently above 80°C
Cause: Dust clogged ventilation and bearing under-lubrication
Solution: Cleaned motor, applied proper lubrication, checked alignment
Result: Motor temperature stabilized and vibration reduced
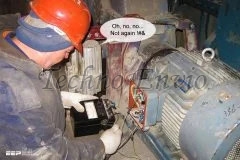
2. Troubleshooting Motors
Motor troubleshooting is the systematic process of identifying and correcting causes of motor failure or poor performance. Effective troubleshooting ensures minimal downtime, reduces repair costs, and extends motor life.
A structured approach helps separate mechanical, electrical, and environmental issues, allowing faster, more accurate repairs.
2.1 Common Problems and Solutions
1. Motor Does Not Start
Possible Causes:
-
Faulty power supply or blown fuses
-
Faulty starting winding (DC motors)
-
Damaged capacitor (single-phase AC motors)
-
Tripped thermal overload or motor protection devices
Action Steps:
-
Verify supply voltage at motor terminals using a multimeter
-
Check fuses, circuit breakers, and disconnect switches
-
Inspect start winding for continuity
-
Test capacitors in single-phase motors for correct capacitance
-
Reset thermal protection devices and verify motor current
Practical Example:
A 3-phase pump motor failed to start. Measurement revealed one phase voltage was missing due to a blown fuse. Replacing the fuse restored normal operation.
2. Overheating
Possible Causes:
-
Overload (mechanical load exceeds motor rating)
-
Poor ventilation (dust, dirt, or blocked vents)
-
Voltage imbalance (unequal voltage across phases)
-
High ambient temperature exceeding motor rating
Action Steps:
-
Reduce mechanical load or operate within rated limits
-
Clean motor ventilation and ensure airflow
-
Measure phase voltages; correct imbalance if present
-
Use cooling fans or adjust environment temperature if needed
Example:
A conveyor motor running in a dusty environment overheated. Cleaning the motor and adding a protective fan improved cooling and reduced motor temperature by 20°C.
3. Excessive Vibration or Noise
Possible Causes:
-
Misalignment between motor and load
-
Worn or damaged bearings
-
Unbalanced rotor
-
Loose mounting bolts
Action Steps:
-
Check motor and load alignment with a laser or dial indicator
-
Inspect and lubricate or replace bearings
-
Balance rotor if necessary
-
Tighten mounting bolts and baseplate
Example:
A fan motor produced loud vibration. Inspection revealed loose mounting bolts and misaligned coupling. Correcting alignment and tightening bolts eliminated vibration.
4. Low Speed or Torque
Possible Causes:
-
Supply voltage too low or fluctuating
-
High slip in induction motors
-
Mechanical load heavier than rated capacity
-
Incorrect motor settings or drive parameters
Action Steps:
-
Measure motor voltage and verify it matches nameplate ratings
-
Reduce mechanical load or adjust drive settings
-
Verify motor speed and slip using tachometer
-
Check that motor type and rating match load requirements
Example:
A pump motor running below rated speed was supplied with 380 V instead of 415 V. Increasing voltage restored full speed and torque.
5. Electrical Faults

Possible Causes:
-
Short circuits between windings
-
Insulation breakdown due to moisture or aging
-
Phase failure in three-phase motors
-
Faulty controllers or VFD parameters
Action Steps:
-
Measure insulation resistance using a megohmmeter; values below 1 MΩ indicate insulation issues
-
Test winding continuity with a multimeter
-
Inspect for loose or corroded connections
-
Replace damaged windings or repair insulation if needed

Example:
A 3-phase induction motor failed due to insulation breakdown between turns. Rewinding the stator resolved the problem.
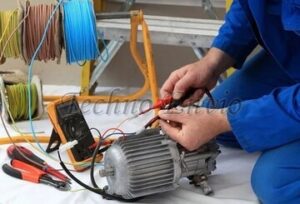
2.2 Step-by-Step Troubleshooting Process
-
Visual Inspection:
-
Look for loose bolts, signs of overheating, dirt, or corrosion
-
-
Electrical Checks:
-
Verify supply voltage, insulation resistance, and continuity
-
-
Mechanical Checks:
-
Inspect bearings, shaft alignment, couplings, and mounting
-
-
Operational Testing:
-
Run motor under no-load and load conditions
-
-
Vibration and Thermal Monitoring:
-
Use vibration sensors and infrared thermometers
-
-
Corrective Action:
-
Repair or replace damaged components
-
-
Preventive Measures:
-
Update maintenance schedule, monitor conditions regularly
-
2.3 Tips for Effective Motor Troubleshooting
-
Always follow safety procedures: disconnect power before inspection
-
Use proper tools: megger, multimeter, tachometer, vibration analyzer
-
Document problems and solutions for future reference
-
Compare performance to motor nameplate specifications
-
Consider environmental factors such as dust, moisture, and ambient temperature
2.2 Step-by-Step Troubleshooting Procedure
A systematic troubleshooting procedure ensures fast, accurate fault diagnosis and minimizes downtime. Follow these steps in sequence to identify mechanical, electrical, and operational issues.
Step 1: Visual Inspection
-
Inspect the motor and surrounding area for loose connections, damaged cables, worn bearings, or mechanical damage.
-
Look for signs of overheating, such as discoloration of paint or insulation, and check for oil leaks.
-
Tip: Small issues like a loose terminal or dust buildup can escalate into major failures if ignored.
Example: A fan motor tripped daily. Visual inspection revealed dust blocking the ventilation slots, causing overheating. Cleaning restored normal operation.
Step 2: Check Power Supply
-
Measure supply voltage, phase sequence, and frequency using a multimeter or clamp meter.
-
Verify that the supply matches motor nameplate specifications.
-
Tip: Phase loss or incorrect phase sequence can prevent starting or damage three-phase motors.
Example: A three-phase pump failed to start. Testing revealed one missing phase due to a blown fuse. Replacing the fuse restored operation.
Step 3: Measure Current and Voltage
-
Check line currents for overload or imbalance.
-
Compare readings with motor nameplate full-load current.
-
Voltage imbalance of more than 2–3% can cause overheating and reduced torque.
-
Tip: Record readings for trend analysis; rising current may indicate load or bearing problems.
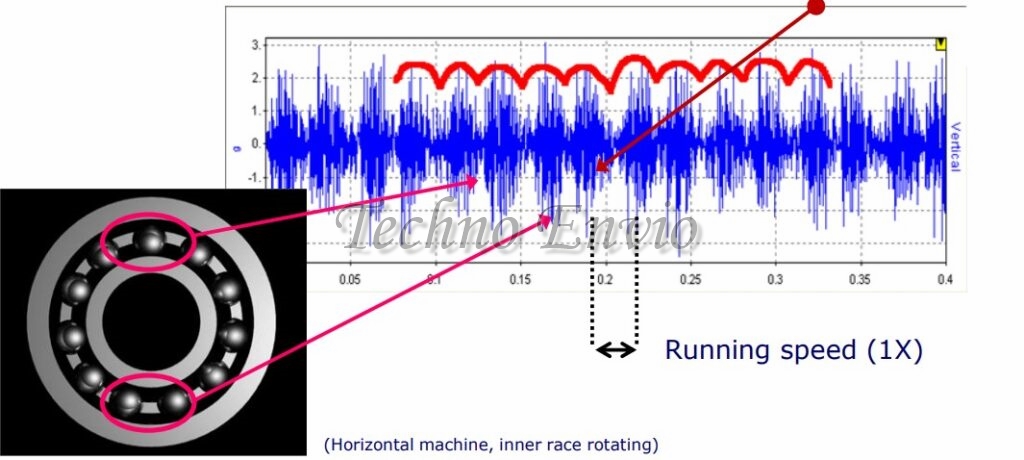
Step 4: Inspect Bearings and Shaft
-
Listen for unusual noises, such as grinding or rattling.
-
Check for excessive vibration with a vibration meter or dial indicator.
-
Ensure shaft rotates freely without binding or wobbling.
-
Tip: Bearing issues are a leading cause of motor failure; replace worn bearings immediately.
Example: A conveyor motor showed vibration. Bearing inspection revealed metal shavings. Replacing bearings eliminated vibration.
Step 5: Test Insulation Resistance
-
Use a megohmmeter to measure insulation resistance between windings and ground.
-
Typical acceptable values: ≥1 MΩ at 500 V for industrial motors.
-
Low insulation indicates moisture, contamination, or winding degradation.
-
Tip: Regular insulation testing can prevent catastrophic electrical failures.
Step 6: Corrective Action
-
Replace or repair faulty components based on the findings:
-
Electrical: Windings, fuses, capacitors, or terminal connections
-
Mechanical: Bearings, couplings, or alignment
-
Operational: Adjust load, cooling, or drive settings
-
Step 7: Re-test Motor
-
Start the motor and monitor:
-
Voltage and current
-
Vibration and noise
-
Temperature rise
-
-
Confirm the motor operates within manufacturer specifications.
Tip: Keep a record of tests and repairs for future reference and trend analysis.
2.3 Motor Maintenance Schedule
A structured maintenance schedule ensures reliable performance, reduces downtime, and extends motor life. Below is a recommended schedule for industrial motors:
| Frequency | Task | Notes |
|---|---|---|
| Daily | Visual inspection, check temperature | Quick check to detect obvious problems such as overheating, smoke, or unusual sounds |
| Weekly | Clean ventilation vents, tighten electrical connections | Prevents dust accumulation, corrosion, and loose terminals |
| Monthly | Lubricate bearings, measure voltage and current | Ensures smooth mechanical operation and electrical performance |
| Quarterly | Vibration and thermal analysis | Detect early faults in bearings, alignment, and load variations |
| Annually | Comprehensive inspection and testing | Replace worn bearings, check insulation resistance, verify alignment, and review operating parameters |
Maintenance Tips
-
Always follow manufacturer specifications for lubrication and torque values
-
Use infrared thermometers and vibration meters for early detection of overheating or misalignment
-
Document all maintenance activities for accountability and trend tracking
-
Train personnel in safe handling procedures and proper troubleshooting techniques
Practical Example
A 50 HP industrial pump motor in a chemical plant:
-
Problem: Frequent overheating and vibration
-
Action: Followed step-by-step troubleshooting: visual inspection → found clogged vents, vibration measurement → found misaligned coupling, insulation test → within limits
-
Result: Cleaned vents, realigned coupling, lubricated bearings → motor temperature stabilized, vibration reduced, and energy efficiency improved
Conclusion
Regular maintenance and systematic troubleshooting are essential for motor reliability and efficiency. Combining preventive and predictive practices, monitoring vibration, temperature, and electrical parameters, and following a structured troubleshooting procedure ensures motors operate safely and efficiently for years.
By applying these practices along with hands-on mini-projects, engineers, technicians, and hobbyists can develop practical skills for diagnosing and maintaining DC, AC, and single-phase motors.