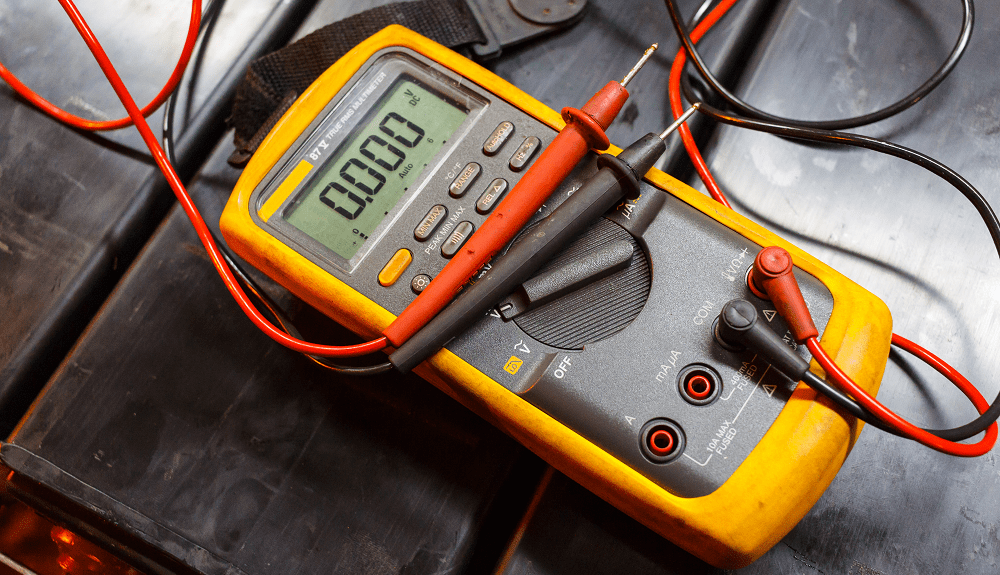
- Put the black lead to the ammeter’s COM port.
- Many multimeters can measure amperes (A) and can be used as an ammeter. Even when using a multimeter, the black lead should always be connected to the COM port.
- Check that you’re using the right ports! Improper wiring may eventually cause the ammeter to burn out.
- Plug the red lead to the ammeter’s A port.
- If you’re using a multimeter, you could simply see a VmA or similar port. Insert the red lead into the port. It is compatible with all of the multimeter’s functionalities.
- If your device has a dedicated port, such as V, it is used to measure voltage and resistance.


- To test the ammeter, put the metal probe tips together.
- If the display remains at one, the meter may be broken. It happens occasionally when a fuse burns out due to a powerful electrical shock.
- You won’t be able to test it this way if your meter doesn’t have a resistance setting. Try connecting it to a circuit. If it does not respond when the power is turned on, it is most likely burned out.

- According to the current you are testing, set the meter’s dial to AC or DC.
- A battery circuit is an example of a DC current. Electricity passes from the positive terminal to the circuit’s negative terminal and back.
- AC circuits are used to transport power in houses, business buildings, and other places where large amounts of energy are required.
- It should be noted that certain ammeters only test for AC or DC. If yours is like this, it will almost certainly be labelled, and you will not have a variety of options to pick from. AC is often depicted by a squiggly line, whereas DC is typically represented by a straight line.
- Adjust the ammeter’s range scale to match your circuit.
- Many ammeters have many settings ranging from amps to milliamps and microamps. An amp is 1,000 milliamps in comparison.
- Milliamps may be measured in a rudimentary circuit using a tiny battery. Set the metre to 2 A, then reduce it to a milliamp setting until you obtain a steady result. More stronger circuits, such as those in your house, should be measured in amps.
- Many ammeters compute the range automatically. If your meter lacks range settings, you won’t have to bother about adjusting it yourself.
2How to use a clamp ammeter to measure current.
- Open the clamp by pressing the button on it.

The clamp is frequently included in the ammeter’s top. To release the clamp, you can press the large red button that is visible. A similar-functioning plug-in clamp attachment is also available for several digital ammeters. If yours is similar, open the jaws after inserting the clamp into the ammeter’s open ports. 11]
A plug-in clamp will be color-coded, just like the standard probe leads that are typically used to measure amperage. Connect the red wire to the A or VmA port and the black lead to the COM port.
- Close the clamp around any single wire.

The primary cables that need to be tested are the red, white, and black cables. In many cases, the whole electrical current in a circuit flows through these wires. That being said, the color palette may differ depending on your location. Clamp-on ammeters are useful because they eliminate the need to remove the conducting wires altogether. Turning off the electricity is not even necessary if the wires are well-insulated. But keep in mind not to touch any exposed wires or other metal parts that can shock you.
- Set the control wheel to the suitable range to test the current.

The specific options you have will change based on the type of meter you own. The majority of clamp-on devices automatically identify the range and have a single amperage setting. Turn the dial to A, which stands for alternating current (AC), which is typically shown by a wavy line.
You may use the same dial setting on most clamp-on ammeters since they detect both AC and DC current.

Ammeters can have many range settings. Verify that you are using the right one. In general, if you anticipate a weaker current, start with the biggest setting and lower the dial.
Remember that clamp-on ammeters are often multimeters with additional testing capabilities for resistance and other measures. Verify that the ammeter mode settings are proper.
If the electricity isn’t already on, turn it on. Keep an eye out for the ammeter’s screen to illuminate and show the current intensity in amps. When you’re finished, release the ammeter’s jaws by pressing the trigger, then slide them off the wire you tested.
By sensing the electrical field surrounding the wire, the ammeter operates. It is equally accurate as one that has to be wired into the system.
Remember that you may receive various readouts from wires that are colored differently. You can see the actual power of the circuit by looking at the white neutral wire, black and red power wires, and white neutral wire. Green ground wires, for example, don’t conduct the entire electricity.
Pingback: How to Inspect a Temperature Controller and Fix Common Issues - technoenvio.com
Glad I found this on google .
I wanted to create you one bit of note to be able to thank you over again for your stunning basics you’ve shared on this website. This has been simply unbelievably open-handed of you to convey freely exactly what a lot of folks would have advertised as an e-book to earn some money for themselves, most importantly considering the fact that you could have done it in case you decided. The thoughts likewise served to be a good way to be aware that some people have the identical desire just like mine to learn many more in respect of this problem. I’m sure there are several more fun moments up front for individuals that read carefully your website.
Thank you.