Induction motors are electric motors that utilize electromagnets and are commonly found in appliances such as fans, freezers, and air conditioners. If you find the induction motor of an appliance trembling or not working at all, it may be time to repair the bearings within. Bearings in a motor decrease friction, allowing the unit to run smoothly and silently, but they will fail if they are old. While it is a time-consuming operation that needs you to disassemble the motor, you can change the bearings on your own in a matter of hours. However, changing the bearings in a motor might be tough if you don’t have the right tools, so don’t be afraid to call a specialist if necessary.
Induction Motor
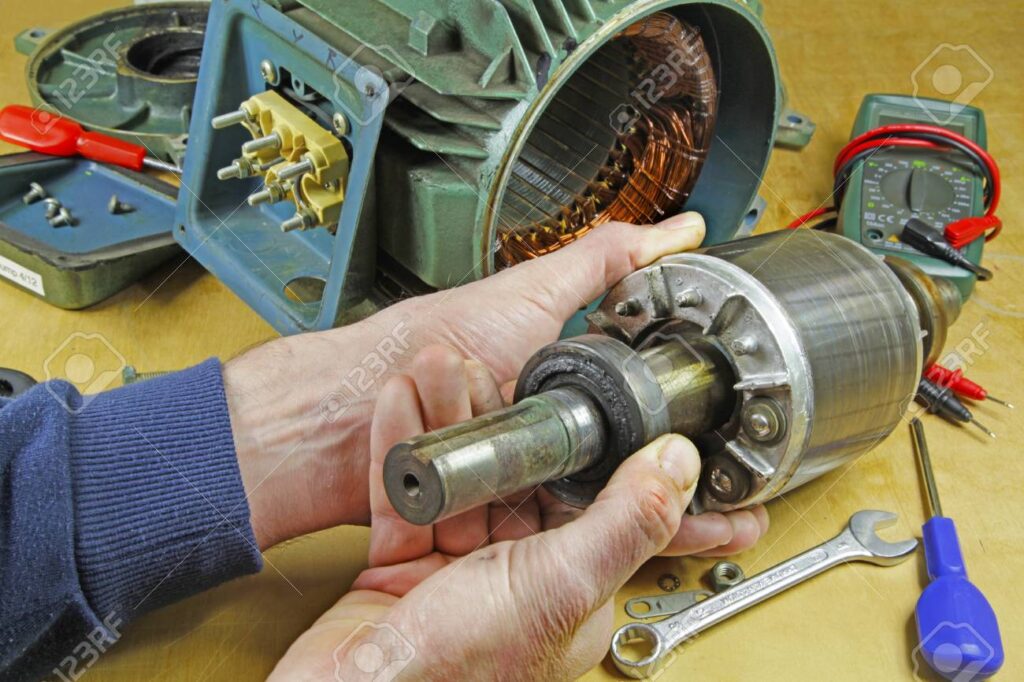
Disassembling the Induction motor
1Disconnect the motor and unplug the appliance.
Unplug the power cable from your motor if it is still plugged in or connected to an appliance. To prevent injuries, leave the motor unplugged the entire time you’re working. Unplug the box-shaped connector holding any wires that are fastened to the motor’s side. With a wrench, remove any nuts holding the motor within the device so you may remove the motor.[1]
- Never work on your motor while it is still connected to electricity because you might get electrocuted.
- The method for removing the motor will differ based on the appliance. To find out how to disconnect the motor on your appliance, consult the owner’s handbook.
2Using a ratchet, remove the fan cover and fan from the motor’s end.
Look for the enclosed and vented end of the motor. Locate and loosen the bolts around the top and bottom borders of the cover using your ratchet. Remove the cover to see the fan below. Detach the fan from the main body of the motor with a ratchet or a screwdriver.
- If you’re having difficulties twisting the bolts on the cover or the fan, try greasing them with WD-40.
- When you’re finished removing the lid, screw the bolts back into the holes so you don’t lose them.
3Mark the tops of the motor’s end caps and the main housing’s seams.
The end caps are the metal housings that cover the internal electronics of your motor, but it might be difficult to remember which way to replace them later. Find the seams between the end caps and the main body of the motor. Draw a line with your marker that crosses across the seam. That way, you can match up your markings when you replace the end cap.
- You don’t have to mark the top of the end cap if you don’t want to.
You may also mark the top of your end cap with a centre punch. Place the punch tip on top of the end cap and hammer it 1-2 times. Without damaging the motor, the punch will leave a small dent in the metal.
4Remove the nuts from the tie rods’ threaded ends.
Tie rods are the lengthy horizontal bolts that hold your motor’s end caps in place. Examine each end cap for four nuts put into the threaded tie rods. Loosen the nuts using a ratchet or tool and remove them from the tie rods.
- The threaded ends of the tie rods are usually found on the same side of the motor as the fan.
- Nuts will be present on just one of the end caps. Instead, the other end cap will have permanent bolts.
5Remove the tie rods from the motor.
After you’ve removed all of the nuts, grasp one of the bolts on the other end cap. Pull the tie rod straight out of the engine and set it aside. Then, in the same manner, remove the remaining bolts.
To avoid losing the nuts, screw them back onto the tie rods.
6With a dead blow hammer, remove the motor’s end caps.
A dead blow hammer is a rubber-coated mallet that does not leave marks or dents when used. Place the edge of your hammer against the seam of the end cap, directly beneath the hole for the top left nut. To assist dislodge the end cap, lightly smack it away from the motor 3-4 times. Switch to the bottom right hole and tap it with your hammer. Hit the end cap from opposing sides alternately until it pops off. Then, on the opposite end cap, repeat the operation.
- If you use a metal hammer, you risk damaging the motor’s internal components.
Removing the Bearings
1Use a degreaser to clean the motor’s shaft.
On your motor, you can use any chemical spray degreaser. Find the horizontal metal shaft that runs through the center of the engine, and then spray your degreaser on the exposed ends. Before removing the degreaser with a shop towel, let it rest for 5–10 seconds.
- A spray degreaser is available from your local hardware shop.
2Attach a bearing extractor to the rear of one of your bearings.
Locate the silver donut-shaped bearing attached to one end of the shaft. Place the extractor’s center pole on the end of the shaft so that its claw extends towards the bearing. Turn the extractor’s adjustment knob to open the claw and allow the bearing to fit within. Tighten the knob again so that the claw seals around the bearing. If the claw tips do not hit the inner ring of the bearing, your motor may be damaged.
- A bearing extractor may be purchased online or at a local hardware shop.
- Bearings are frequently too tight to remove without an extractor.
3To remove the bearing from the shaft, turn the extractor’s handle using a wrench.
Locate the handle at the end of the extractor that connects to the center pole. Turn the wrench or ratchet handle clockwise. As you tighten the handle, the center pole lengthens and forces the bearing off the shaft. Continue rotating the lever until the bearing easily slips off the shaft.
- If the bearing still won’t move, try spraying the shaft with WD-40 or another lubricant to assist loosen it.
- If the motor’s shaft spins as you crank the handle, try keeping it stationary with your other hand or a wrench. Otherwise, the extractor may not function effectively.
If you remove the spacer washer behind the bearing by accident, slip it back onto the motor’s shaft to avoid losing them.
4Repeat the procedure on the second bearing.
Turn the motor around to remove the bearing from the opposite side. Wrap the extractor around the second bearing such that the centre pole presses on the shaft’s end. Pull the bearing straight off the shaft by rotating the handle clockwise.
- Save at least one of your bearings so that you may replace them with the same size. Otherwise, you may recycle them or transport them to a scrapyard near you.
Heating and Installing New Bearings
1Purchase replacement bearings that are the same size and kind as the previous ones.
Bearings for your engine may be purchased online or at your local hardware shop. Bring over one of the old bearings to compare the sizes and kinds. Bearings are often offered in pairs, but you may have to purchase them separately.
- Look for a label or imprint on the main body of the motor that lists the bearing sizes you want.
- Use of bearings that are the wrong size or kind might harm your motor or cause it to function inefficiently.
- Keep your bearings in their original box until you’re ready to install them.
2Heat the bearing with an induction heater until it reaches 70-120°F (20-50°C).
Check the bearing’s temperature using a laser thermometer and record the reading. Warm up the heating rod from the induction heater by inserting it into the center of the bearing. Check the heater’s display or your thermometer every 30-60 seconds to see whether the bearing is 50-70°F (20-50°C) warmer than it was at the start. If it is, turn off the heating.
- Only heat one bearing at a time, since the other may cool before you can install it.
- You may get a bearing-specific induction heater online or at your local hardware shop.
- Heat your bearings no higher than 250 °F (121 °C) to avoid damaging them.
- Heat causes the inner ring of the bearing to expand, making it easier to glide onto the motor shaft. If not, the bearing may be too tight to glide on.
If you don’t have an induction heater, you can use an oil bath. Fill a jar halfway with oil having a flash point more than 482 °F (250 °C) and heat it to roughly 175-250 °F (79-121 °C). Place the bearings in the oil and let them to completely warm up. Be extra cautious since oil is incredibly combustible and will burn you if it gets on you

3Wear heat-resistant work gloves.
Do not touch the bearing with your bare hands since it will be extremely hot. Choose a thick pair of heat-resistant work gloves so you can handle the bearing safely without being burned.
- If you don’t have gloves, you can handle the bearing with pliers or tongs.
4Insert the bearing into the shaft until it makes contact with the washer.
When the bearing has heated up, carefully remove the heating rod and lay it aside. Pick up your bearing and place it on either end of the motor’s shaft. Place the bearing all the way onto the shaft, pressing it firmly against the washer.
- It is not necessary to oil the shaft before installing the bearing.
- If you used an oil bath, clean the bearings before installing them on the motor.
5If the bearing does not glide on easily, use a bearing installation tool to reposition it.
Even after heating the bearing, it may become stuck on the motor’s shaft. Place a bearing installation tool, which resembles a long tube with a round end the same size as your bearing, against the front of the bearing. Tap the opposite end of the bearing into place with your dead blow hammer.
- A bearing installation tool set is available online or at your local hardware shop.
- If you don’t want to heat the bearing, you can use a bearing installation tool, but it will take longer to install.
Caution: Never strike the bearing with a hammer directly as this might quickly damage it.
6Warm up and insert the second bearing on the other side of the motor.
Allow the heating rod to warm up in the middle of the second bearing. Remove it from the heater and slide it onto the shaft at the opposite end of the motor after it’s 50-70°F (20-50°C) warmer. Check that the bearing is firmly pressed against the washer.
7Allow the bearings to cool before reassembling the motor.
Avoid moving the motor since the bearings are still loose and might slip out of place. Allow the bearings to cool until they are cool to the touch. Screw the end caps, fan, and fan cover back onto the motor
- The bearings will normally cool down in 30-60 minutes.
8Reinstall the motor in your appliance and re-plug it in.
Install the motor in the appliance and bolt it down so it doesn’t move. Replace the wire connector on the motor’s side so that electricity may flow again. After you’ve completed installing everything, plug the device into a power outlet.
- If the motor continues to malfunction, you may need to pay someone to come and repair it.