Cleaning an Electric Motor

Cleaning an Electric Motor a dirty motor necessitates the use of tiny metal and electrical components. To avoid injuring the motor’s components, gently remove them. They can be removed with a degreaser or other non-flammable cleaning solution. If you have any problems when cleaning the motor, take it to an electrician for expert restoration.

ways to Cleaning an Electric Motor

Disassembling the Electric Motor

1Remove the motor from its mounting and disconnect it.

Unplug the motor from the power supply. Power should not be fed into the motor, otherwise you will be shocked. Remove any fasteners that are keeping the motor in place.


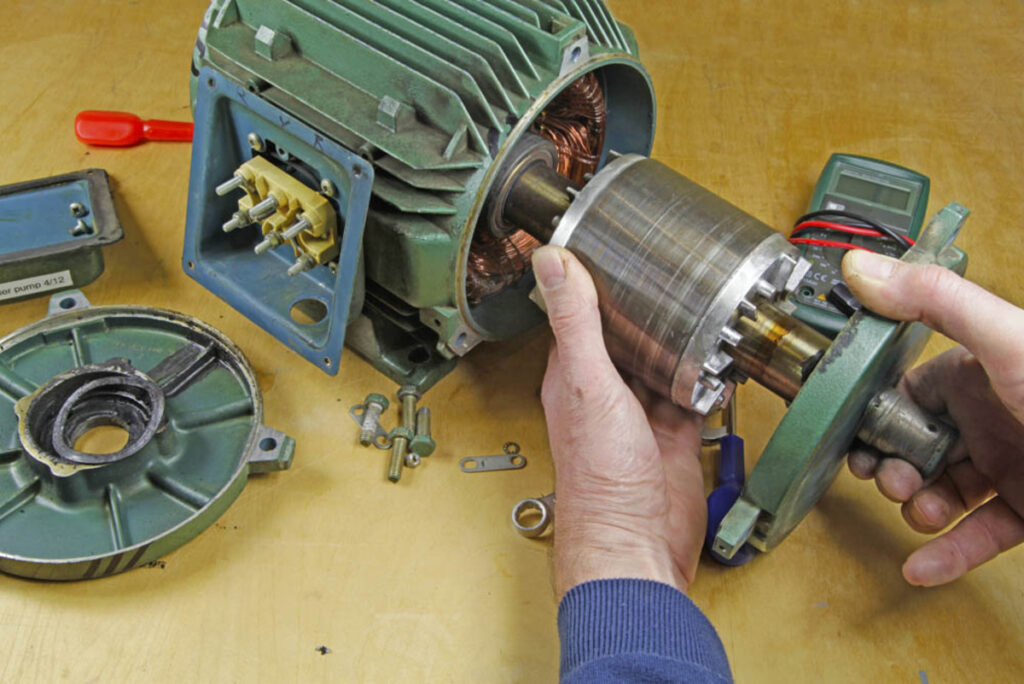
  • If you suspect the motor has an electrical charge, you can test it using a multimeter.


Cleaning an Electric Motor


2Unplug the wires from the terminals.

Examine the outside of the motor for the wires that link it to other components in an electrical system. They are frequently bright red, black, or blue, making them easy to see. To remove the wires from the terminals, twist them using a wrench.
  • Make a note of the wire positions so that you can rejoin them later. You might wish to snap images to aid in this process.


3Using a gear puller, remove the puller.

Locate the gear shaft, which is a metal rod that protrudes from one of the motor’s ends. The pulley is the little element that resembles a wheel at the shaft’s end. Grab the pulley with the claws of the gear puller and pull it off the shaft.
  • A gear puller is available at most hardware stores.


4With a center punch, mark the end bells.

You’ll find circular bits of casing, commonly made of PVC, at both ends of the motor. These end bells will need to be precisely adjusted later, and designating them now makes that much easier. Tap the center punch on the outside of each end bell with a hammer to make a tiny mark.
  • Make one mark on the end bell beneath the pulley and two marks on the opposite end bell.
  • Your motor may also include housings, which are lengthy metal tubes. These can be found behind the final bells. Mark them all the same.


5Using a socket wrench, remove the bolts from the end bells.

Each bell is expected to contain 8 bolts. Look for a set of bolts in the center, followed by another set around the outside rim. To loosen and remove them, use the socket wrench to spin them anticlockwise.
  • Depending on your motor, you may require a box wrench or a screwdriver instead.


6Using a soft-faced hammer and screwdriver, tap the bells loose.

A soft-faced hammer features a head made of plastic, wood, or lead. Position the screwdriver between the bell and the motor. It should be placed on the side of the motor that is closest to the motor. Then, bang the screwdriver with the hammer until you can take the bell off the motor.
  • Don’t forget to grab both bells, including the one on the other side of the pulley.


7Disconnect the motor’s ends and the starting switch.

The starting switch will be located at the motor’s pulley end. It will be located behind the last bell and housing. There will be several copper cables joining. Carefully remove the metal piece that is holding the wires, taking care not to damage any of them.
  • If your motor does not have a starting switch, it will have a horizontal brush housing. Look inside for the large bundle of copper wires.
  • Take note of the location and amount of shims. Shims are flat metal objects that resemble two-pronged forks.


Cleaning the Components

1Wipe the dirt off the motor’s exterior using a rag.

Avoid dampening since you don’t want water in the electrical components. If the motor is still unclean, you can use a professional degreaser. These products can get rid of filth, but make sure to follow the manufacturer’s directions.
  • Many general stores and automotive retailers sell degreasers.


2Brush dirt away from wiring areas with 220 to 240-grit sandpaper.

Treat the regions surrounding the copper wires in the starting switch or brush housing with just very fine sandpaper. Wipe the metal components down gently to remove any dirt. To clean this region, avoid using water or harsh chemicals.
  • Rubbing the wires or getting them wet might cause your motor to short circuit. The tightly coiled wires are difficult for most individuals to repair.


3Clean the interior of the motor using a rag and degreaser.

Choose a non-flammable cleaning solvent, such as the degreaser you used to clean the motor’s exterior. Moisten a clean rag with the solution, then use it to wipe trash from whatever location you can reach. Avoid getting anything on the wires.


  • If you can’t reach part of the degreaser, blow on the area until it dries.


Reassembling the Motor

1Reassemble the wires in the switch or brush ring.

When you removed these items, you most likely loosened some of the wires. Wrap the wires around each other into coils to fit them back inside. Take care not to damage them.
  • The motor should function normally as long as the cables are not damaged.


2Replace the components that were removed for cleaning.

Begin at the front end by installing the rotor, which is a thick, striped piece of metal mounted on a shaft. A metal ring with ball bearings will be seen, and you may lubricate it with a drop of oil. The housing and end bell should then be slid onto the shaft.
  • Remember to slip the opposite end bell onto the shaft’s opposite end.
  • Make sure any shims you spotted before are properly positioned around the end bells.


3End bolts should be inserted into end bells.

Insert eight bolts into each end bell. Turn the bolts clockwise with a socket wrench until they are securely fastened. If your motor contains screws, secure the end bells with a screwdriver instead.


4Tap the end bolts into place using a hammer.

Make use of a soft-faced hammer made of wood, plastic, or lead. Gently hammer the end bells down until they hit the housings behind them. Do this for both end bells to ensure they keep the remainder of the motor components in place.


5To test the motor, turn the shaft by hand.

If everything is correctly mounted, the motor shaft will spin freely. If it doesn’t spin, the end bells are generally the culprit. Ascertain that they are properly positioned and aligned.
  • Check the punch markings to ensure that the bells are on the correct end of the motor. Remove the bells and replace them.


6Connect the connections to power the motor.

If you took a picture of the cables before, this shouldn’t be too tough. Place the wires on their respective terminals, then tighten the terminal screws clockwise to secure the wires. You may then test your motor by plugging it into a power source.
  • If you’re not sure where to put the cables, search for a schematic online. Connect the wires according to their color.


Leave a Reply

Your email address will not be published. Required fields are marked *