Common Problems with Injection Molding Machines and How to Solve Them
Injection molding machines are vital in the manufacturing industry, creating everything from small plastic components to large, complex structures. However, like any machinery, they can encounter a variety of issues. Identifying and solving these problems efficiently is key to maintaining quality and productivity. In this article, we will explore some of the most common problems with injection molding machines and provide practical solutions to overcome them.
1. Warping
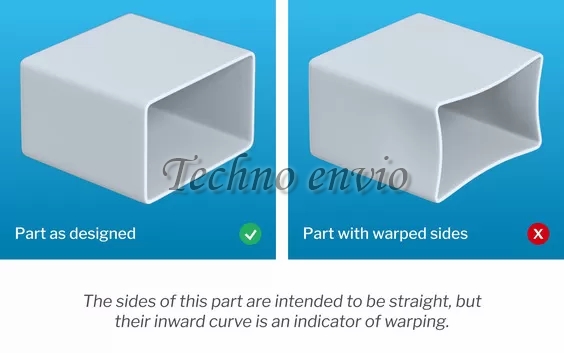
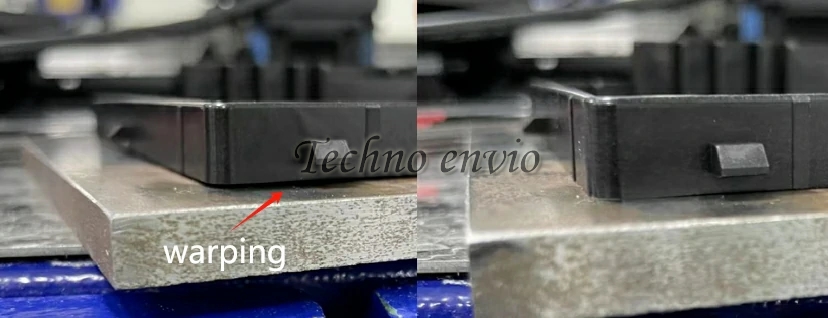
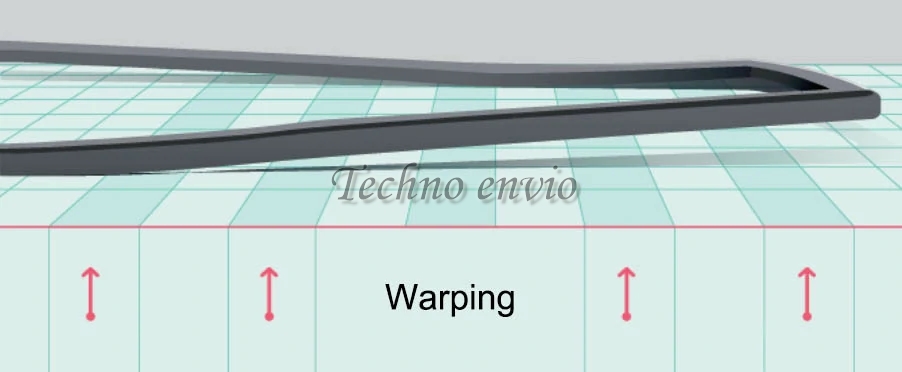
Warping occurs when parts of the plastic cool unevenly, causing the molded part to twist or bend out of shape. This can ruin the appearance and functionality of a product.
Causes:
- Uneven cooling rates across the mold
- Inconsistent mold temperature
- Incorrect part design with variations in thickness
Solutions:
- Even Cooling: Ensure that the cooling rate is uniform by improving the design of the mold, using cooling channels, and making sure that the cooling system is functioning properly.
- Consistent Mold Temperature: Using mold heaters or adjusting the coolant temperature can help maintain consistent heat across the mold, preventing uneven contraction.
- Design Modifications: If warping continues to be a problem, redesigning parts to have consistent wall thickness can help reduce stress during cooling.
2. Short Shot
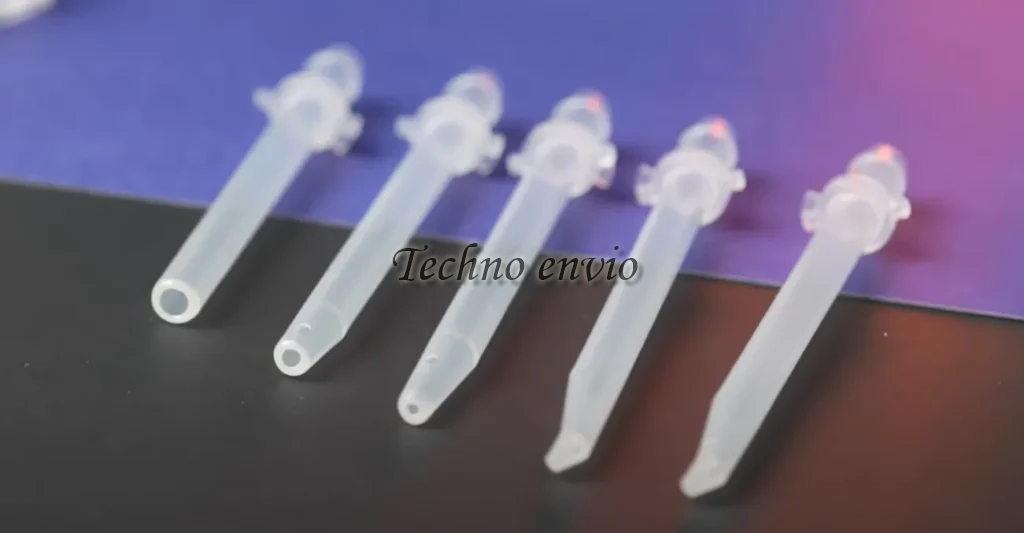
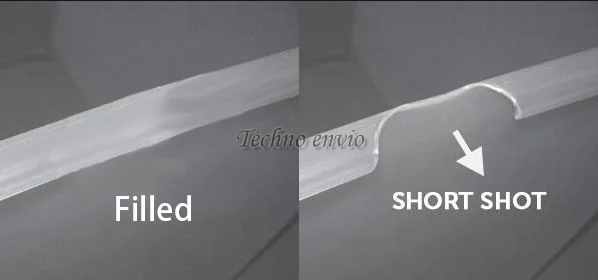
A short shot happens when the mold cavity is not completely filled, resulting in incomplete parts. This can be a major issue, especially in parts requiring precision and durability.
Causes:
- Insufficient injection pressure or speed
- Clogged or insufficient venting
- Low melt temperature
Solutions:
- Increase Injection Pressure: By increasing the injection pressure and speed, you can ensure that the mold is properly filled.
- Improve Venting: Make sure vents are clear to avoid trapped air, which can prevent the material from filling the mold completely.
- Raise Melt Temperature: Increasing the melt temperature can improve the flow of the material, ensuring the mold is fully filled.
3. Flash
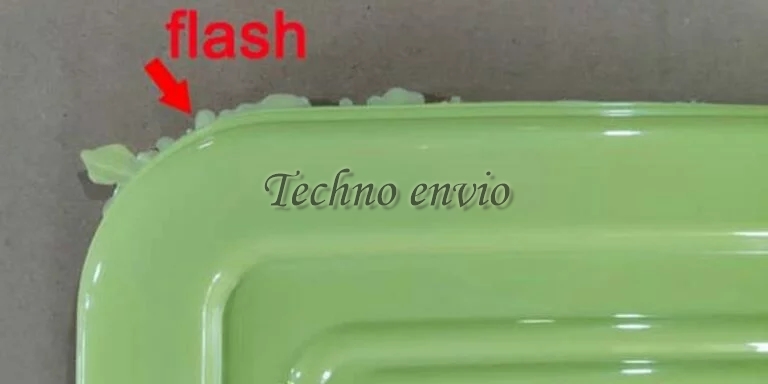
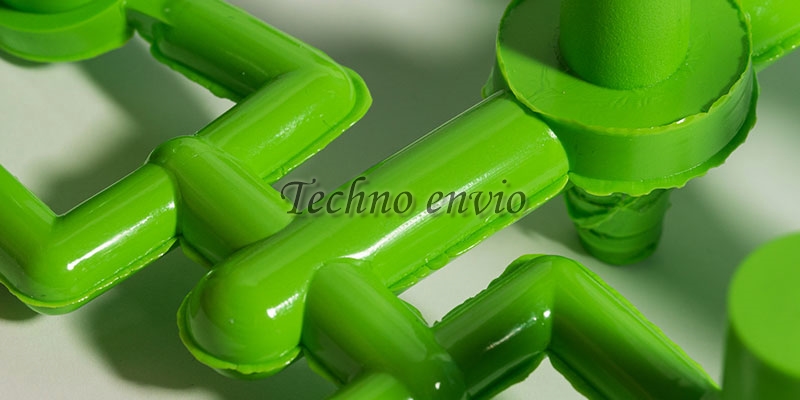
Flash refers to excess material that escapes from the mold and forms thin layers around the part, usually along the edges.
Causes:
- Excessive injection pressure
- Worn or damaged mold parts
- Misalignment between mold halves
Solutions:
- Reduce Injection Pressure: Reducing the injection pressure may help avoid forcing material into unintended gaps.
- Repair or Replace Worn Molds: Worn or damaged molds should be repaired or replaced to ensure a tight fit between mold halves.
- Ensure Proper Alignment: Regular maintenance of the mold to ensure proper alignment of the mold halves will help prevent flash.
4. Burn Marks
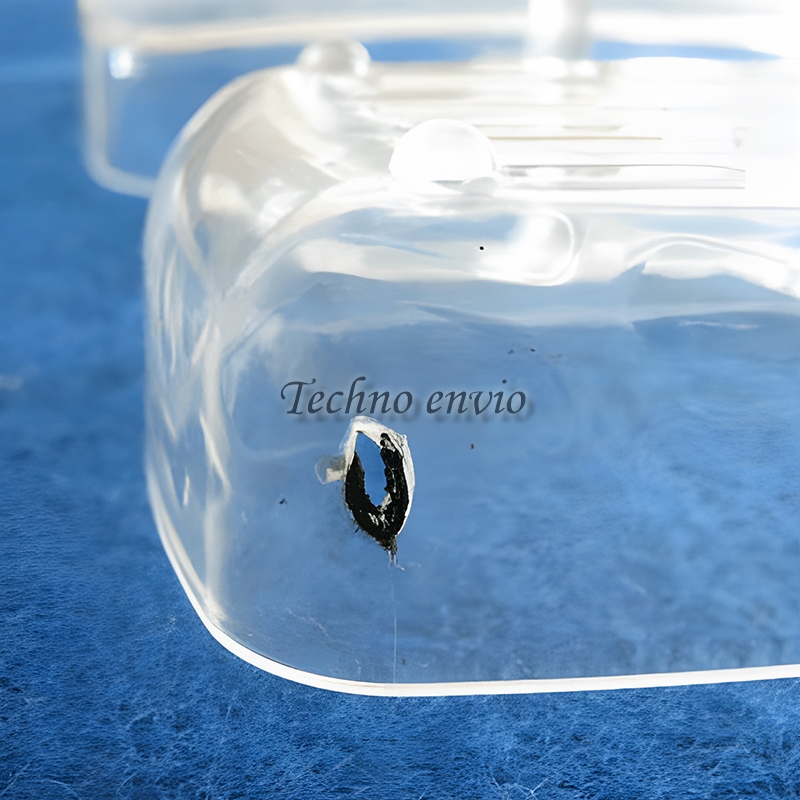
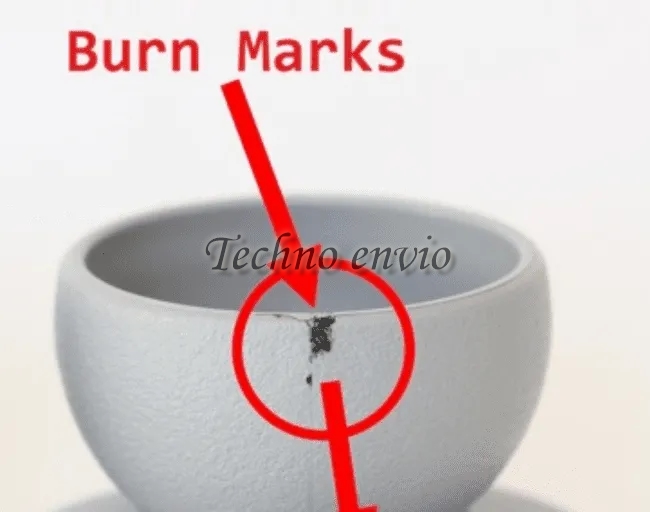
Burn marks appear as black or brown discolorations on the surface of the part. While often cosmetic, burn marks can indicate more serious issues with the molding process.
Causes:
- Overheating of material
- Trapped air in the mold
- High injection speed
Solutions:
- Lower Material Temperature: Reducing the temperature of the melted material can prevent it from burning.
- Enhance Ventilation: Improving ventilation can prevent trapped air, which heats up and causes burns.
- Reduce Injection Speed: Slowing down the injection process reduces the chances of overheating the material, leading to fewer burn marks.
5. Sink Marks
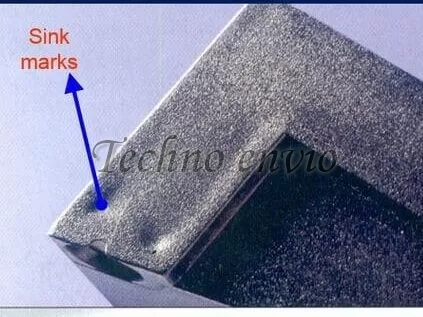
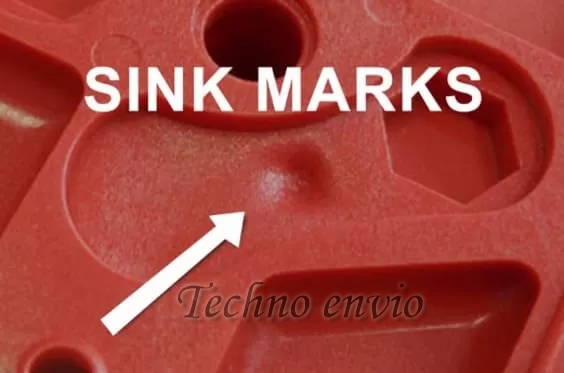
Sink marks are depressions or dimples that occur when the inner material cools and contracts more than the surface. This can affect the structural integrity and appearance of a part.
Causes:
- Uneven cooling or shrinking
- Inadequate packing pressure
- Thick areas in the mold design
Solutions:
- Increase Packing Pressure: Increasing the pressure during the packing phase helps to fill in the voids created by shrinkage.
- Modify Mold Design: Redesigning the part to have consistent wall thickness can reduce the risk of sink marks.
- Improve Cooling System: A more uniform cooling system will prevent sink marks by ensuring that both the surface and inner layers cool evenly.
6. Jetting
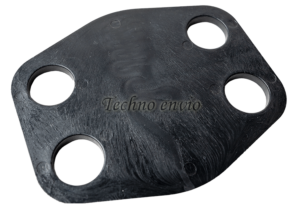
Jetting occurs when the molten material enters the mold at high speed, causing it to form squiggly, snake-like patterns. These can weaken the part and ruin its appearance.
Causes:
- High injection speed
- Improper gate positioning or size
Solutions:
- Reduce Injection Speed: Slowing down the injection speed ensures that the material flows evenly through the mold.
- Optimize Gate Design: Adjusting the size and position of the gate can help smooth out the material flow and eliminate jetting.
7. Delamination in injection molding
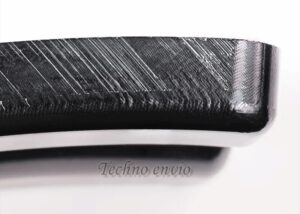
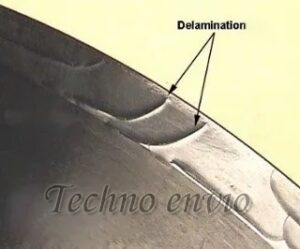
Delamination involves thin layers of the material peeling away from the part, often because of contamination or poor bonding.
Causes:
- Contamination of the plastic material
- Low material temperature
- Excessive moisture in the material
Solutions:
- Use Clean Material: Make sure that the plastic material is free from contaminants such as dust, dirt, or oils.
- Increase Material Temperature: Raising the material temperature will improve bonding between layers, reducing the risk of delamination.
- Dry the Material: Using properly dried material will help reduce moisture-related defects like delamination.
8. Bubbles or Voids in injection molding
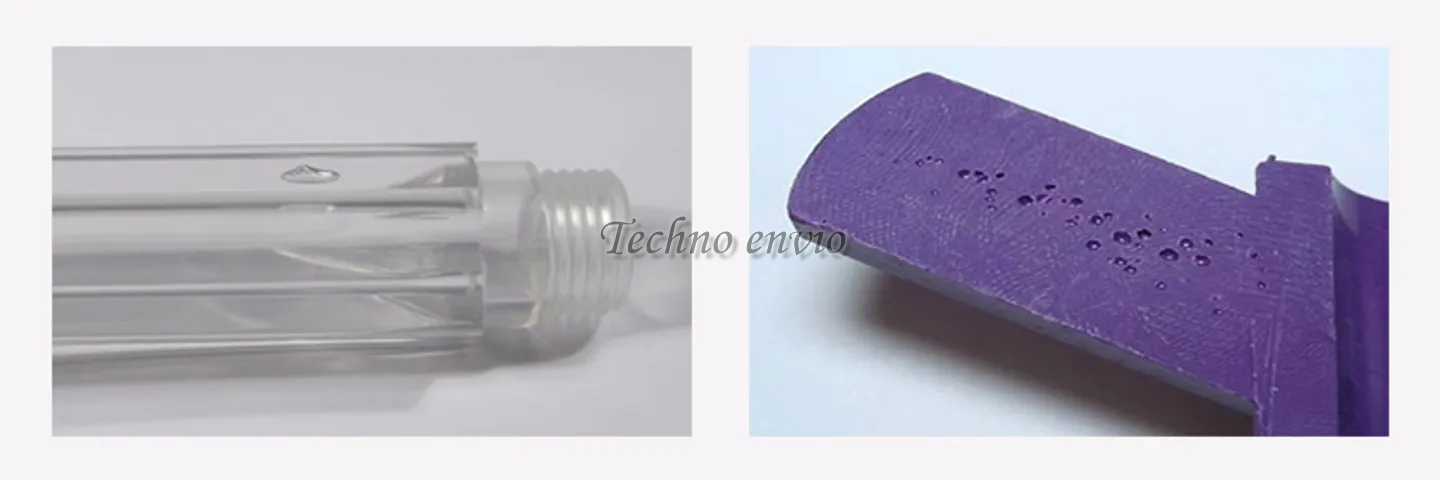
Bubbles or voids inside the plastic can create weak points in the product and are generally caused by trapped gas or moisture in the material.
Causes:
- Trapped air or gas during the molding process
- Moisture in the material
- Insufficient injection pressure
Solutions:
- Increase Injection Pressure: Higher injection pressure can force trapped air out of the material.
- Dry the Material Thoroughly: Ensuring that the plastic material is completely dry before use can help eliminate voids caused by moisture.
- Improve Mold Venting: Proper venting in the mold will allow air to escape, reducing the likelihood of bubbles forming.
Conclusion: Maintain and Prevent for Long-Term Success
Injection molding machines are highly complex, and regular maintenance and careful monitoring of processes can help prevent many of the issues mentioned. Ensuring that your machines are running smoothly and addressing problems quickly will lead to better-quality products and reduced downtime.
In the world of manufacturing, preventing problems is often more efficient than solving them after they occur. If you can identify these common problems early, you’ll be able to optimize your injection molding process and produce high-quality parts consistently.
FAQ:
1. What causes defects in injection molding?
Injection molding defects can be caused by a variety of factors, including improper machine settings, poor mold design, material contamination, uneven cooling, or issues with pressure and temperature. Proper maintenance and careful monitoring of the molding process can help minimize these defects.
2. How can I prevent warping in injection molded parts?
To prevent warping, ensure that the mold temperature is consistent, and consider redesigning the part to have uniform wall thickness. Also, improving the cooling process by using even cooling channels and maintaining uniform pressure during the molding cycle can help.
3. What should I do if I see burn marks on my molded parts?
Burn marks are typically caused by trapped air or overheating. You can resolve this by reducing the injection speed, lowering the melt temperature, and improving mold ventilation to ensure air escapes during the injection process.
4. How do I fix sink marks on plastic parts?
To fix sink marks, increase the packing pressure and improve cooling uniformity. Additionally, ensuring that your mold design has consistent wall thickness can help prevent shrinkage and sink marks during the cooling phase.
5. What causes short shots, and how can I eliminate them?
Short shots are caused when the mold is not fully filled, often due to low injection pressure, poor material flow, or inadequate venting. To eliminate short shots, increase injection pressure, raise melt temperature, and ensure the mold is well-ventilated.
6. How can I avoid flash during the injection molding process?
To avoid flash, make sure your mold is properly aligned, reduce the injection pressure, and inspect the mold for wear or damage. If the mold is worn, it might need repairs or replacement to ensure a tighter fit.
7. Why do bubbles form in my injection molded parts?
Bubbles often form due to trapped air, moisture in the material, or low injection pressure. To avoid bubbles, dry your material thoroughly before use, increase the injection pressure, and ensure proper mold venting.
8. What are the best practices for maintaining an injection molding machine?
Regular maintenance includes cleaning, lubricating moving parts, inspecting the mold for wear and tear, checking for any signs of damage, and making sure cooling systems and vents are working properly. Keeping a maintenance schedule can help avoid unexpected downtime and machine failure.
9. How do I reduce material waste in injection molding?
To reduce waste, optimize your mold design, ensure the correct amount of material is injected into the mold, and maintain proper temperature and pressure settings. Additionally, recycling plastic scrap can help minimize material waste.

