Arduino Introduction
It used to be difficult to create robots that could detect and interact with their surroundings. Arduino now makes it simple. You’ll learn how to construct and create a robot that can walk about, detect its surroundings, and execute a variety of activities using this site with an Arduino microcontroller and software creation environment. All you need is a little programming expertise and an interest in electronics to get started with the entertaining projects.
This guide will walk you through the steps required to create a robot that can move independently and be controlled remotely. There are instructions for both 2WD and 4WD platforms. The platforms illustrated in Figures 1-1 and 1-2 make assembly a breeze, but you may also design your own robot chassis if you like. The control electronics and sensors are connected and used in detail, and the source code is given in this site.

The constructed two-wheeled robot chassis is shown in Figure 1-1.

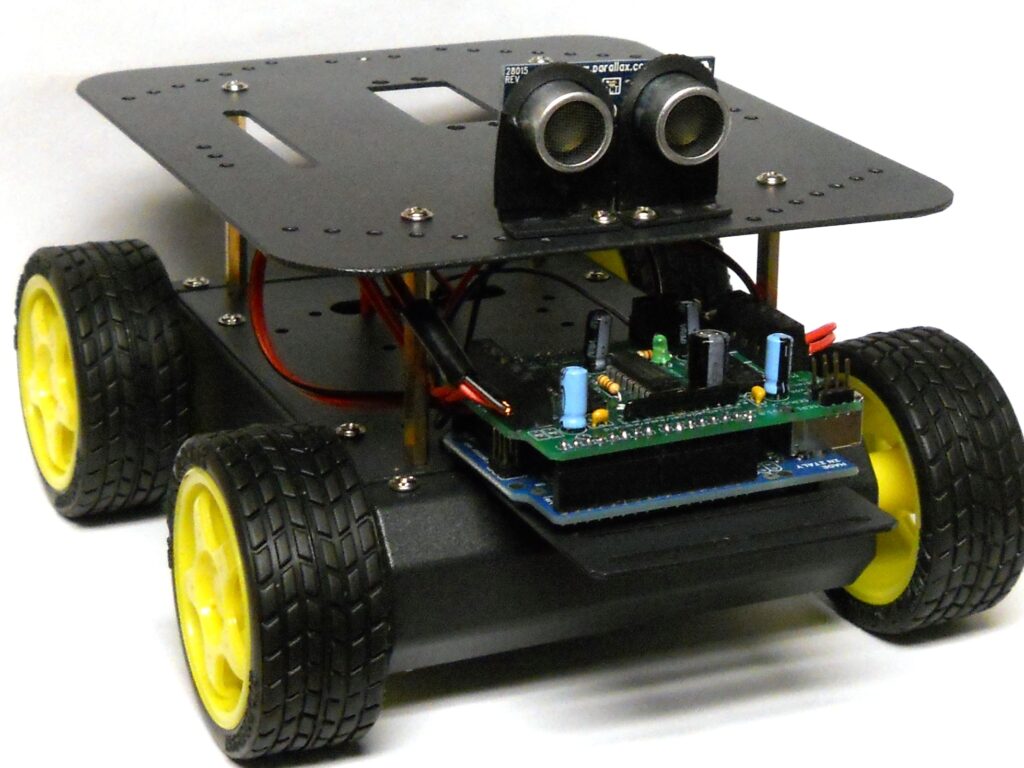
Figure 1-2. The assembled four wheeled robot chassis
Here is a preview of the projects you can build:
• Adding high-level movement capabilities to control speed and direction.
• Enabling the robot to view the ground by employing infrared sensors to discern lines and edges (see Figure 1-3 and Figure 1-4).
• Allowing the robot to look about by scanning with a servo, as shown in Figure 1-5.
• Using a TV remote control or a connected or wireless serial connection, add a remote control.

Robot goes about but stays within the white region (Figure 1-3).

Figure 1-4 shows a robot that follows a black line.

Figure 1-5. Robots with two and four wheels, as well as distance sensors
Make an Arduino-Controlled Robot
Building a robot is unlike any other microcontroller project you’ve ever attempted.
A robot can move and respond to its surroundings, as well as display behaviors that are similar to those of live organisms. Even if these actions are basic, they provide the impression that your product has its own will and aim.
People have been captivated by the idea of creating a machine that looks to have a life of its own throughout history. W. Grey Walter’s robots, which he developed almost 60 years ago, investigated how the rich connections between a limited number of brain cells lead to complex behavior.
There are several types of robots, some of which can crawl, walk, or slither. The robots discussed in this site are the simplest and most often used; they have two or four wheels that are powered by motors.
Choosing your Robot
The tasks in this book may be completed on either a two- or four-wheeled platform, but if you’re not sure which is best for you, consider the following factors:
Robot with two wheels
This is a fantastic choice if you want to practice with challenges that involve dexterity movement, such as line-following. The caster that balances the robot, on the other hand, requires a pretty flat surface.
Robot with four wheels
Because of its four-wheel drive, this robot is a suitable choice for roaming across tougher terrain. This platform features a big top plate on which tiny things can be carried. The robot is heavier and consumes more electricity than the 2WD robot, resulting in a shorter battery life.
The Movement of Robots
The robots in this book travel forward, backward, left, and right in the same way as an automobile does. The wheel motion used to propel the robot forward is shown in Figure 1-6.

Figure 1-6. Robot travels ahead as the left and right wheels spin forward.
The robot will turn if one side’s wheels are not pushed (or are moved more slowly than the other side’s), as shown in Figure 1-7.

Figure 1-7: Robot turns right, but only the left wheels turn.
Reversing the wheel rotation causes the robot to go backward, as seen in Figure 1-8.

Figure 1-8: Robot goes backward as the left and right wheels spin rearward.
These robots, unlike cars (but similar to tanks), can also spin in position by pushing the wheels on either side in opposite directions. The robot will revolve if the wheels on each side spin in different directions. Figure 1-9 depicts rotation in a clockwise direction.

Figure 1-9: Robot spins as the left wheels go ahead and the right wheels reverse. Clockwise.
Arduino Tools
These are the tools you’ll need to put the robot chassis together.
Screwdriver, Phillips You’ll need a little Phillips screwdriver from the hardware store. Long-nose or needle-nose pliers, small For example, the Radio Shack 64-062 4.5-inch mini long-nose pliers (see Figure 1-10) or the Xcelite L4G 4-inch small long-nose pliers. Wire cutters for small jobs Radio Shack 5″ cutters, part number 64-064 (Figure 1-11), or Jameco 161411, for example.

Figure 1-10. Small Pliers

Figure 1-11. Wire Cutters (Side Cutters)
Soldering iron
Radio Shack 640-2070 (Figure 1-12) and Jameco 2094143, for example, are low-cost irons that are excellent for novices. A decent temperature regulated iron, such as the Radio Shack 55027897 or Jameco 146595, is worth the cost if you’re serious about electronics.
22 AWG (.6mm) or thinner solder For instance, call Radio Shack at (800) 640-0013 or Jameco at (800) 73605.

Figure 1-12. Soldering Iron
Greatest
So cute please can you teach me more about this
Thank you for your comment, sure.